[Recipe] Nichijou Tori Chintan - Everyday Clear Chicken Stock
/
Ramen is often regarded as a long and complicated process, but not many are aware that some of the best bowls out there are the simplest. For the past several years, I have embodied the “less is more” mantra in my ramen cooking by simplifying my ingredients and the process to get the most flavor efficiently. It must be the engineer in me that makes me obsessed with efficiency and optimizations.
Ramen broths can be classified into two general categories: a clear pristine chintan broth and a thick cloudy paitan broth. Outside of Japan, most people are familiar with a paitan broth in the form of tonkotsu. In the United States it is rare to find shops that only offers chintan based ramen such as shoyu or shio ramen. Unfortunately tonkotsu ramen has shaped the American Ramen Landscape to focus on rich broth flavored with overpowering garlic and chili oils. While very tasty in its own right, the typical American tonkotsu ramen has become almost a powerful gimmick that masks a lot of subtleties and complex flavors that ramen has to offer. With chintan broths, it is harder to hide mask mistakes as the base flavors are more delicate.
If you are starting on your journey to making ramen from scratch, a tori (chicken) chintan stock is the best place to start in my opinion. Some argue that you should make a paitan broth as it is more forgiving, but you do not pick up on some of the nuances of making ramen stock and building a strong foundation.
Chickens are accessible at every super market unlike pork or beef bones. Chickens also have less dense bones than pork or beef so it takes less time to extract flavor.
Keep in mind the stock is only one component of the broth. It acts as the foundation for the tare (seasoning) and the aroma oil. On its own, it is nothing special tasting like meaty water. As you add salinity and acidity to the broth the inherent flavors, be it good or bad, will start to come through.

Chintan Broth - Clear Soup

Paitan Broth - Thick Opaque Soup
Everyday Tori Chintan
Ingredients
1 whole chicken
1 medium onion
1 bulb of garlic
It does not get much simpler than this. We are looking for pure chicken flavor so less is more. This will allow you to let the quality of your ingredients shine (please, please, please get good quality ingredients) and produce a versatile broth that you can use several types of ramen. You can make a pure and light shoyu or shio ramen, a spicy tan tan men, and even a rich miso ramen.
It can be beneficial to add additional components like chicken feet to amp up the gelatin, but a single bird will give you the composition of a well rounded broth with a good mouthfeel. The meat will provide flavor, the connective tissue from the wings and bones provide gelatin that gives the stock lip smacking mouthfeel. The skin also is a great source of gelatin and fat. The latter is perfect for a garlic onion aroma oil.
Step 1 - The Chicken
The essence of this broth is chicken, so make sure you get a great quality chicken. Organic, cage free, hormone free, air dried, non-GMO etc etc. Some of these can be buzz words and some farms can produce a low quality chicken that checks a lot of these boxes, but you want to do everything you can to get the best quality as you are extracting the flavor from every part of this bird all the way down to the core of its bones. Once I got my hands on a good quality chicken, the generic chicken just doesn’t cut it for me anymore. The basic bird can have a sour off putting characteristic that I just do not want in my ramen.
The bare minimum that I suggest is getting an air-dried chicken. After a chicken is cleaned, they quickly chill the birds to keep them as fresh as possible. Typically chickens are immersion chilled by running them through a ice water bath. Immersion chilled birds have been known to be a little more tough and the flavor is diluted as it has taken on more water than it originally had. Air-dried chicken are chilled with, you guessed it, air. The air will not strip the bird of any of its flavor or add any unwanted characteristics. It is just pure chicken.
Give it a shot. Treat yourself. Try getting a more expensive bird yourself and see what the differences are first hand.

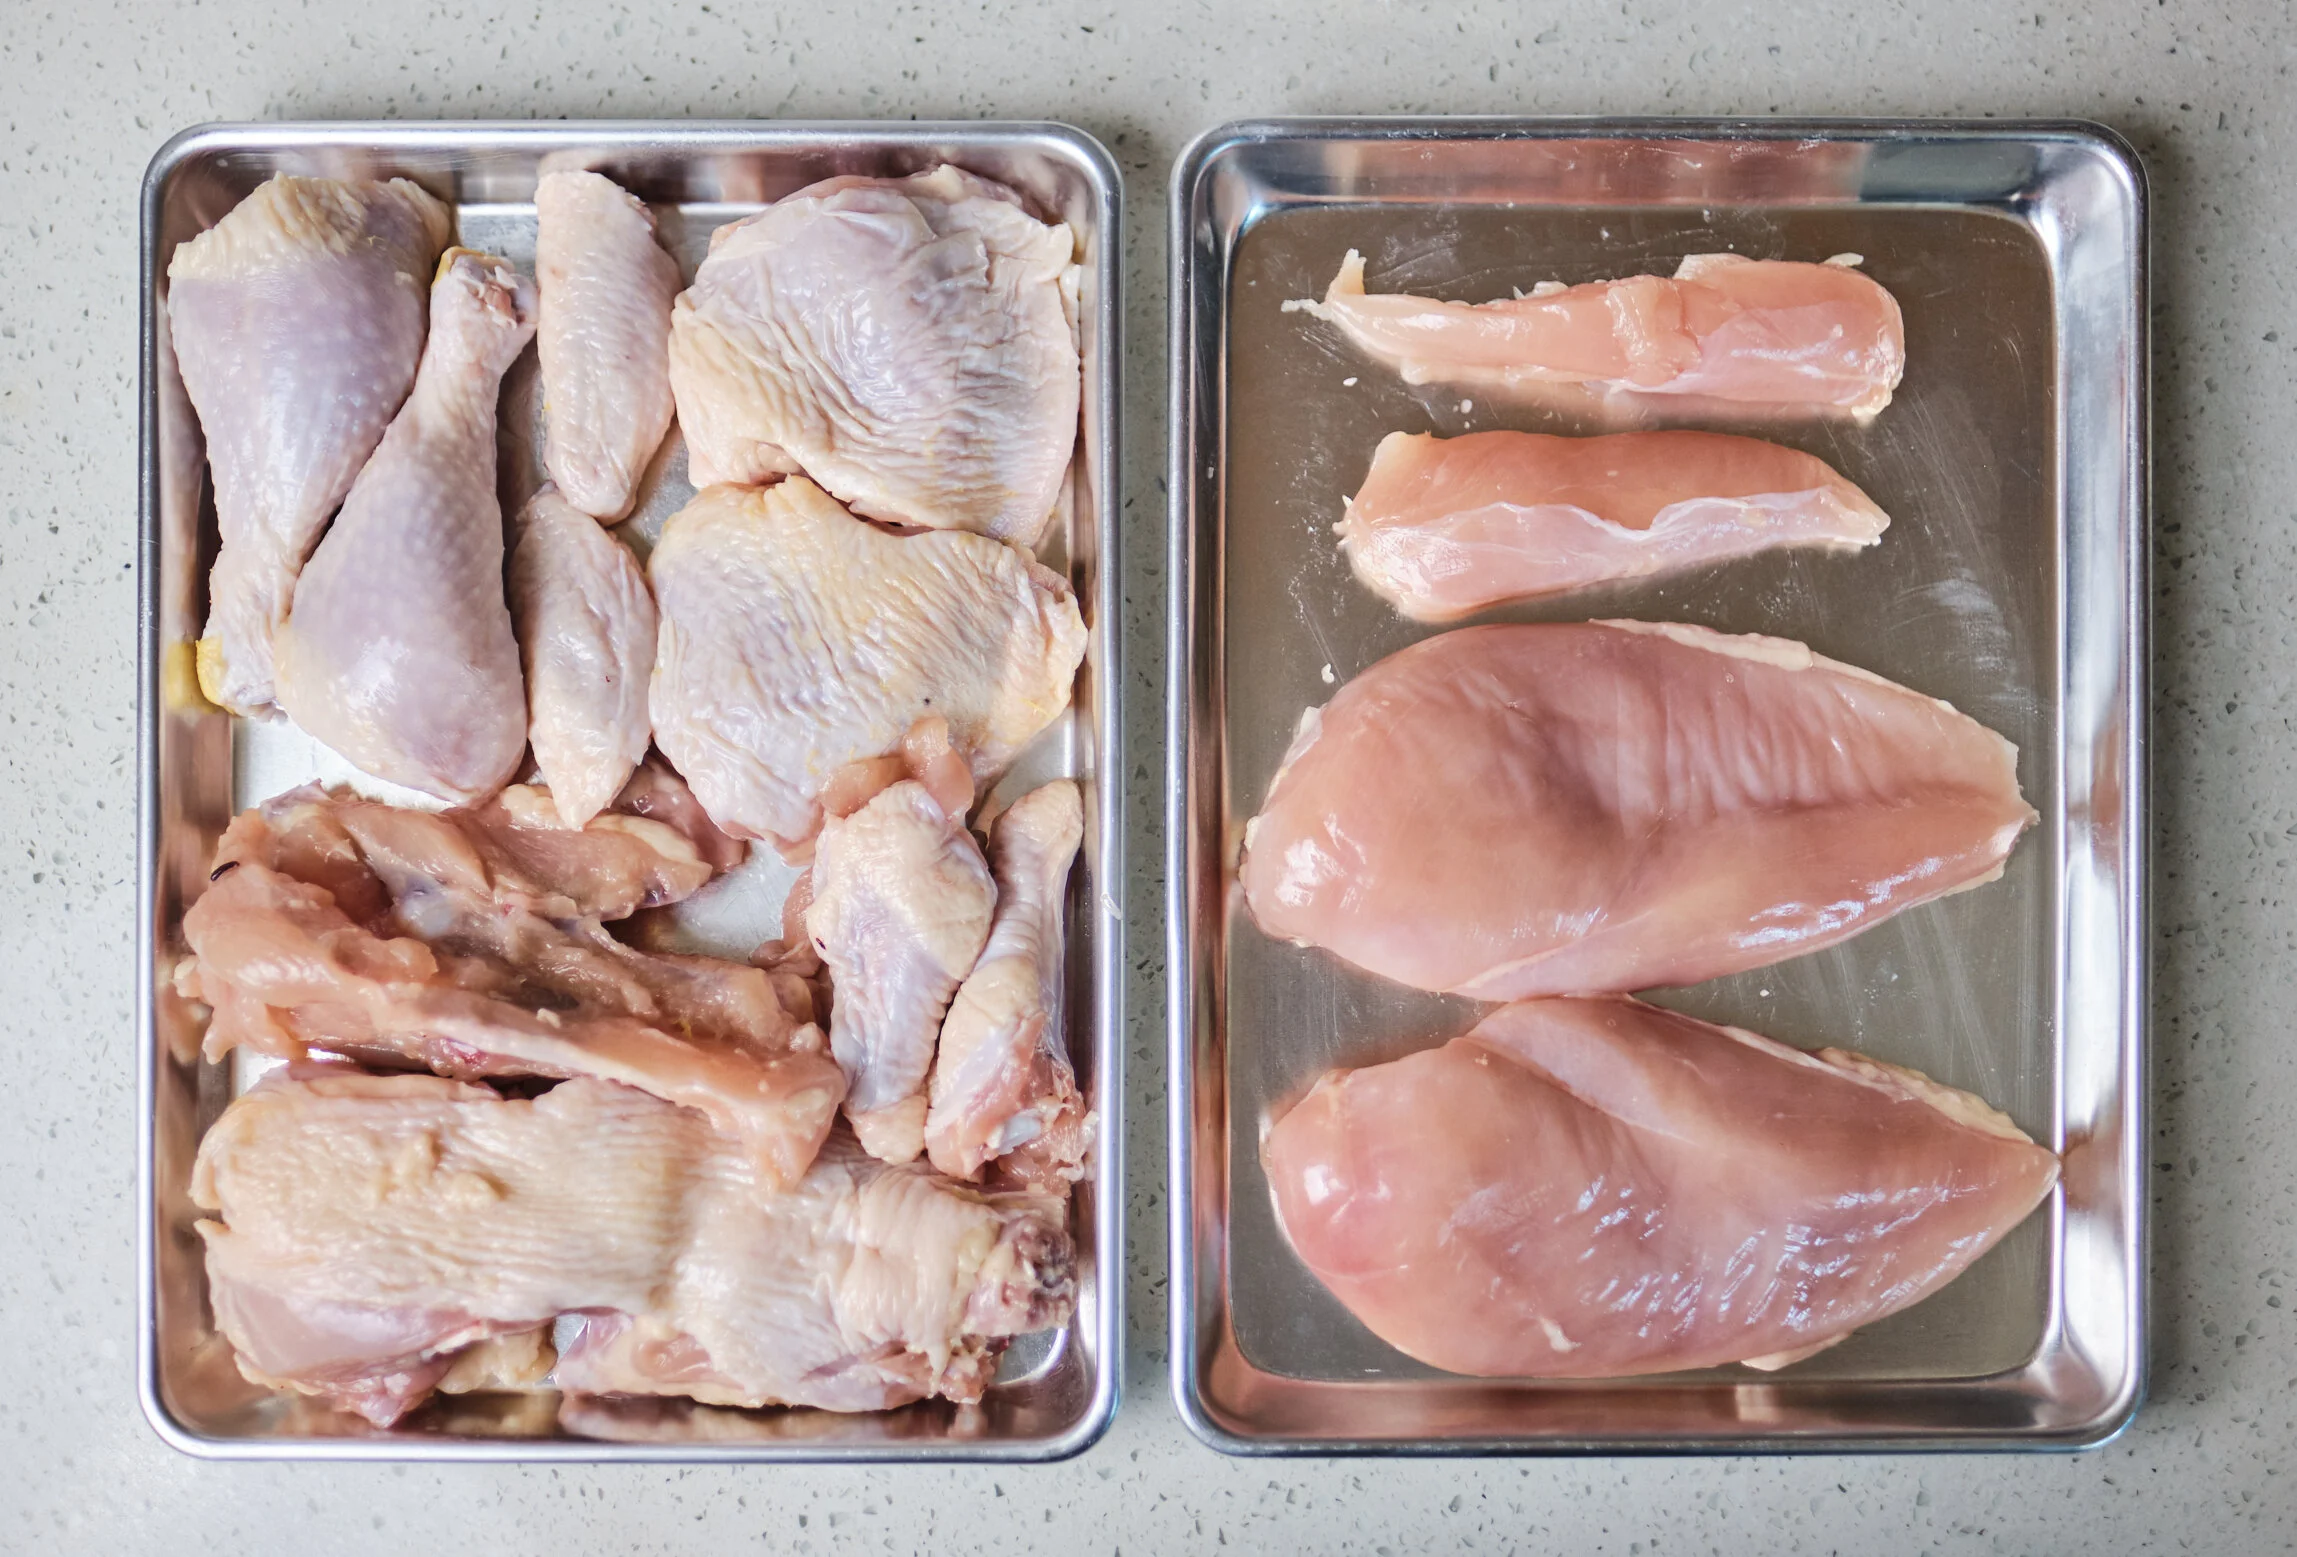
Step 2 - Break it Down
The chicken needs to be separated at every joint into pieces to maximize the extraction of flavor and allow you to efficiently fill your pot. A whole chicken will require a lot more water to cover than a broken down chicken resulting is a stock that is more diluted. Remove the drumsticks, thighs, wings, and breast from the body. The body can then be split into the back and the breast bone. You can set aside the breast and the tenders as toppings as it will be a waste to use all the meat for just the broth. The meat on the thighs and wings have a lot of connective tissue, so it is important you you use these for your stock as this will be one of your sources for gelatin.
If you have time and want to go above and beyond, I suggest removing the skin and setting it aside until later in the stock making process. When heated, skin releases a lot of precious chicken fat that tends to get scooped away when straining skum from the stock. Wait until after the skimming step below to add the skin to yield to most fat.

Step 3 - Simmer, Skim, Sit
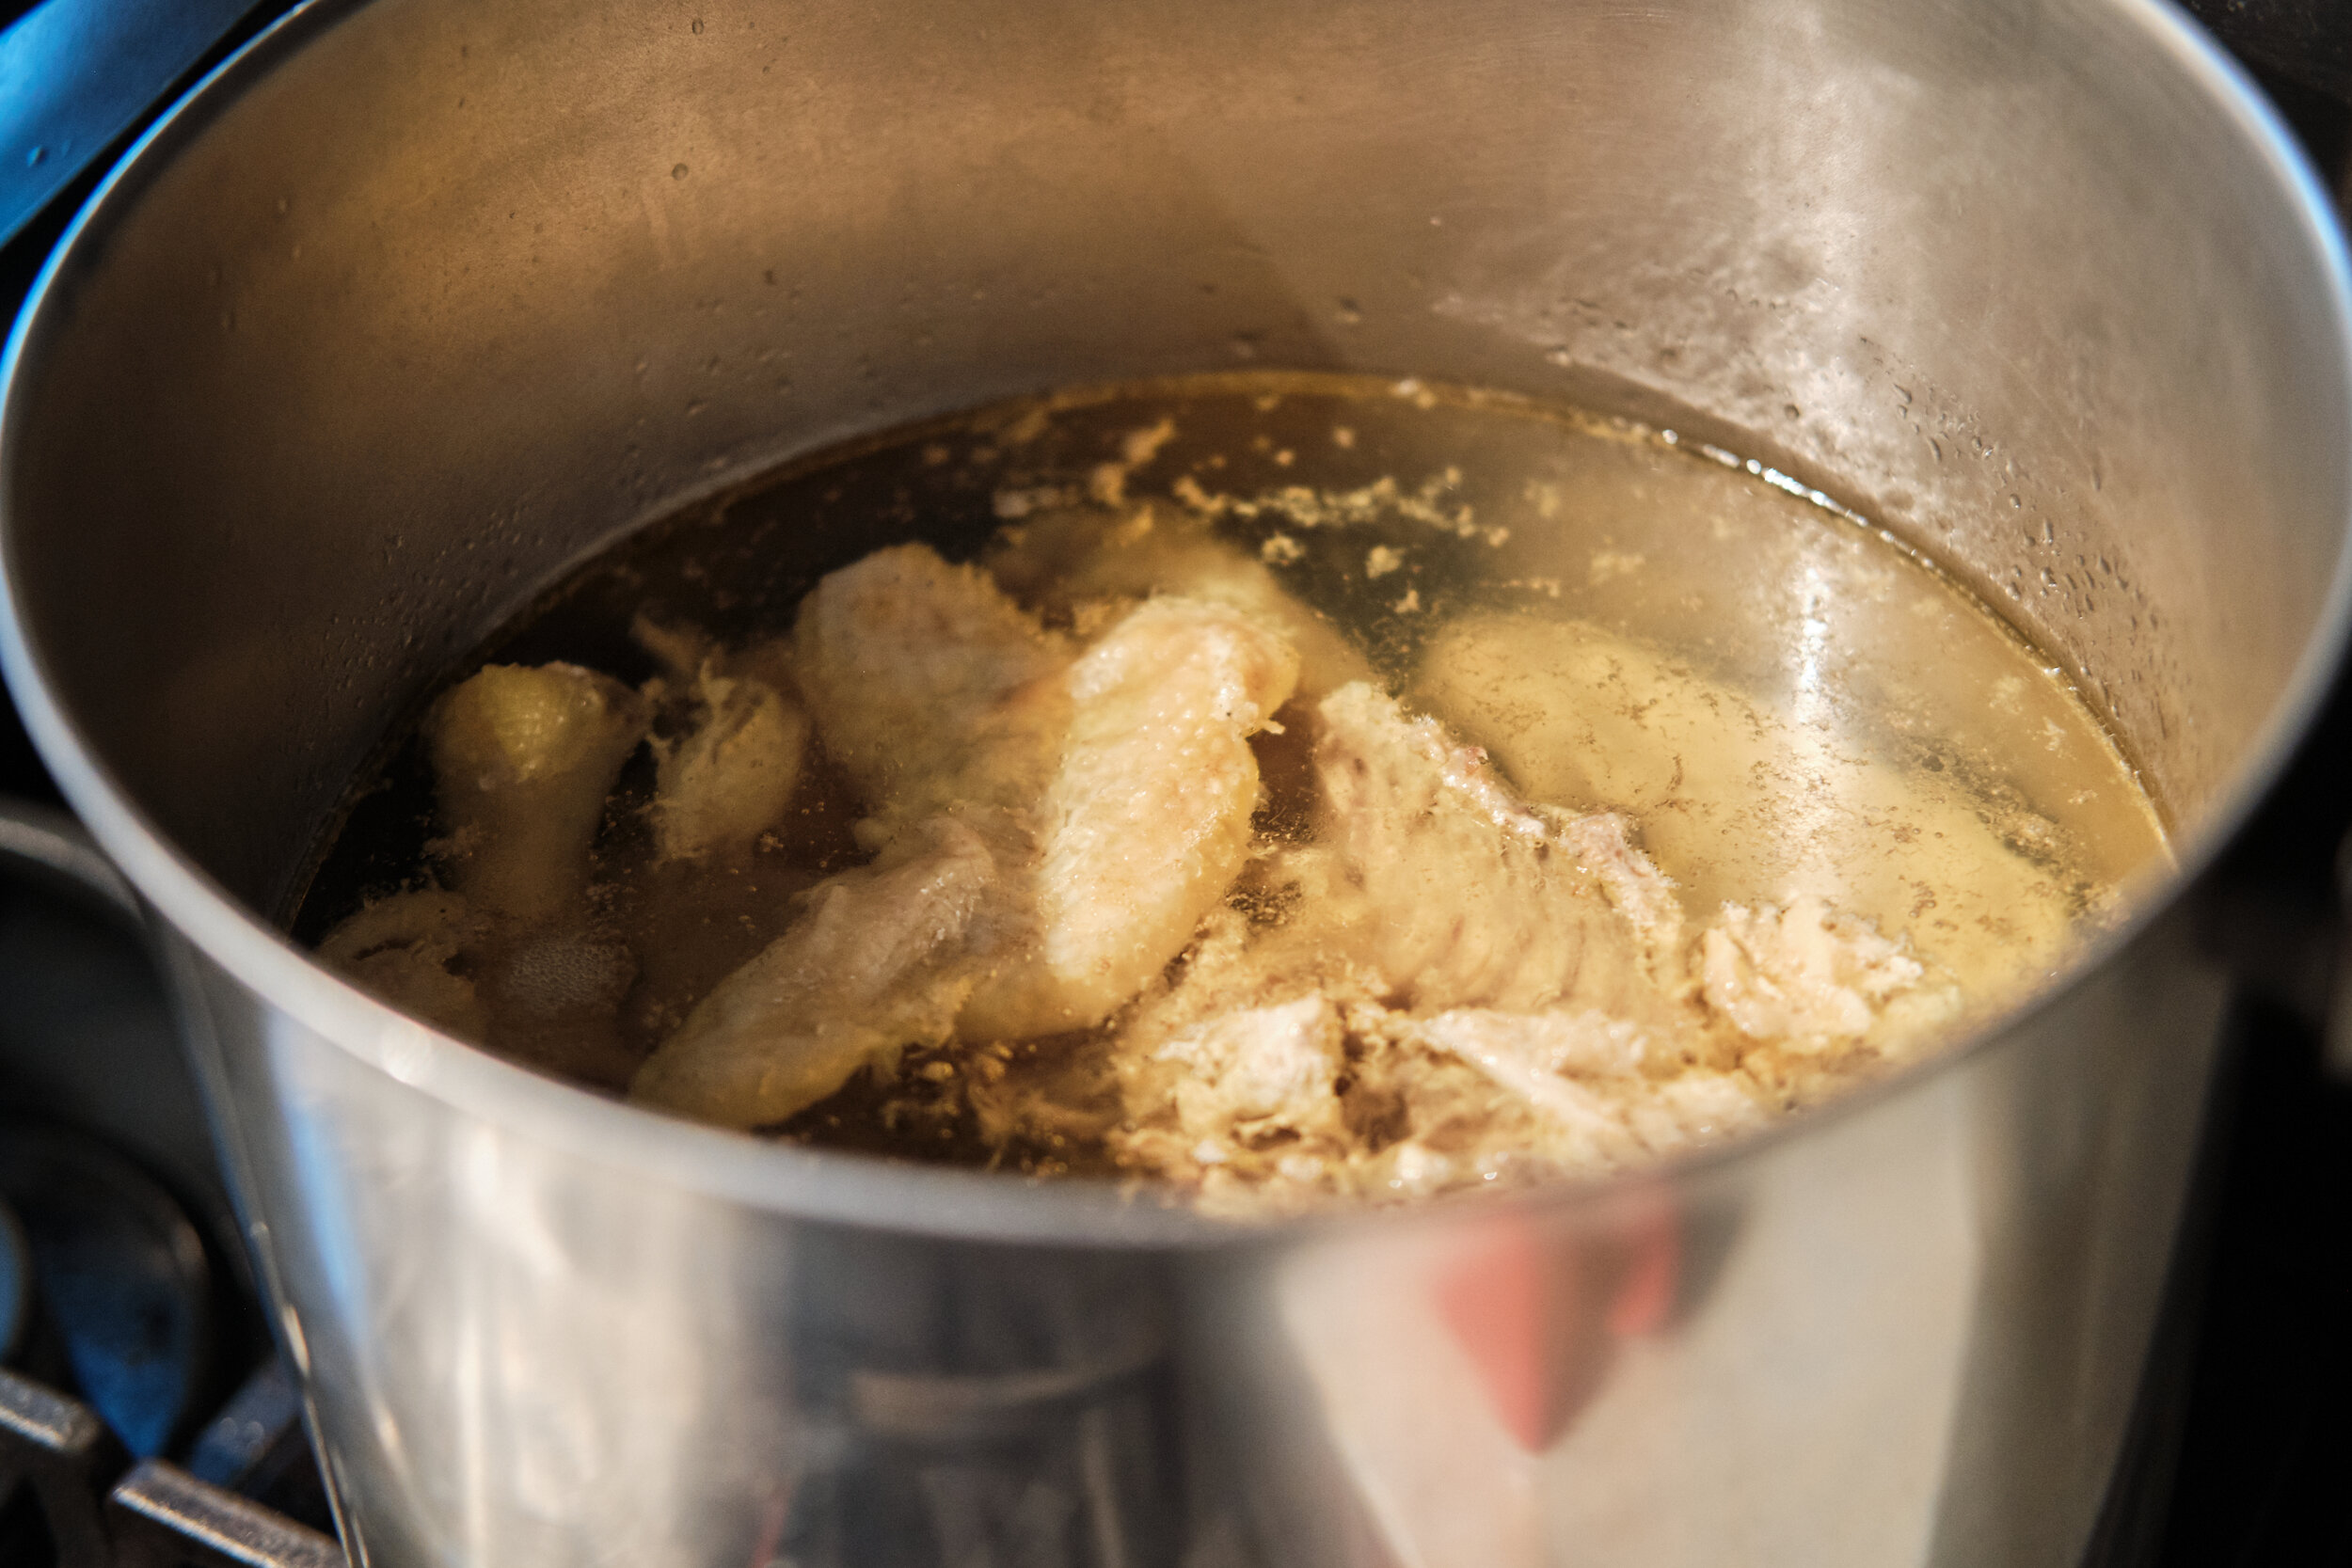
Take all of your pieces of chicken except for the breast and place it into a pot. I suggest using at least an 8 quart pot as it will give you plenty of clearance from the surface of the water and the edge of your pot and you will not have to worry about overboiling and spilling onto your cooking range.
Cover your bones with about 2 times its weight or enough water to cover everything by an inch. The liquid will evaporate while you simmer, reduce, and concentrate the flavors.
Set this on a burner an a medium to medium low heat. Let the heat gradually increase until the liquid approaches a boil. By starting at a cold start and slowly heating the water, you allow the soluble proteins escape the solids and coagulate slowly forming skum.
Do not throw bones into boiling water as a lot of the skum will denature and attach on your bones making it hard to separate. On a similar note, I do not suggest using frozen bones. Please defrost them. I find that it will take a lot longer to extract all the impurities and requires you to boiling your bones at a higher temperature for longer.
As the skum rises to the surface, skim them to prevent them from dissolving back into your stock and/or potentially clouding the liquid. Keep skimming until no more skum rises to the surface. I suggest poking the bones occasionally as it will knock off the impurities stuck to its surface.
Note: Some cooks let the skum dissolve back into the broth, but personally I do not want these impurities in my soup. Especially with poor quality bird, this skum can produce an off flavor in your stock.
Some recipes say to dump the water after the skum has been removed and fill with fresh water, but there is so much flavor in the liquid from this initial step. A lot of flavor is from smell and you smell how much flavor has already been released from the bones. If you were to use pork bones, I would dump the initial blanching liquid they tend to have an unpleasant funk.
We want the water to be below a simmer to keep the broth as clear as possible. If the liquid is bubbling, the fats and solids can be emulsified into the broth and will reduce your clarity. At a minimum I would keep the soup at about 176 F (80 C) up to 190 F (88 C). If you are closer to 190 F, there will be slightly more evaporation which may reduce the yield of your broth but will concentrate the flavor. You may need to add additional water at the end, but I will leave it up to your personal preference.
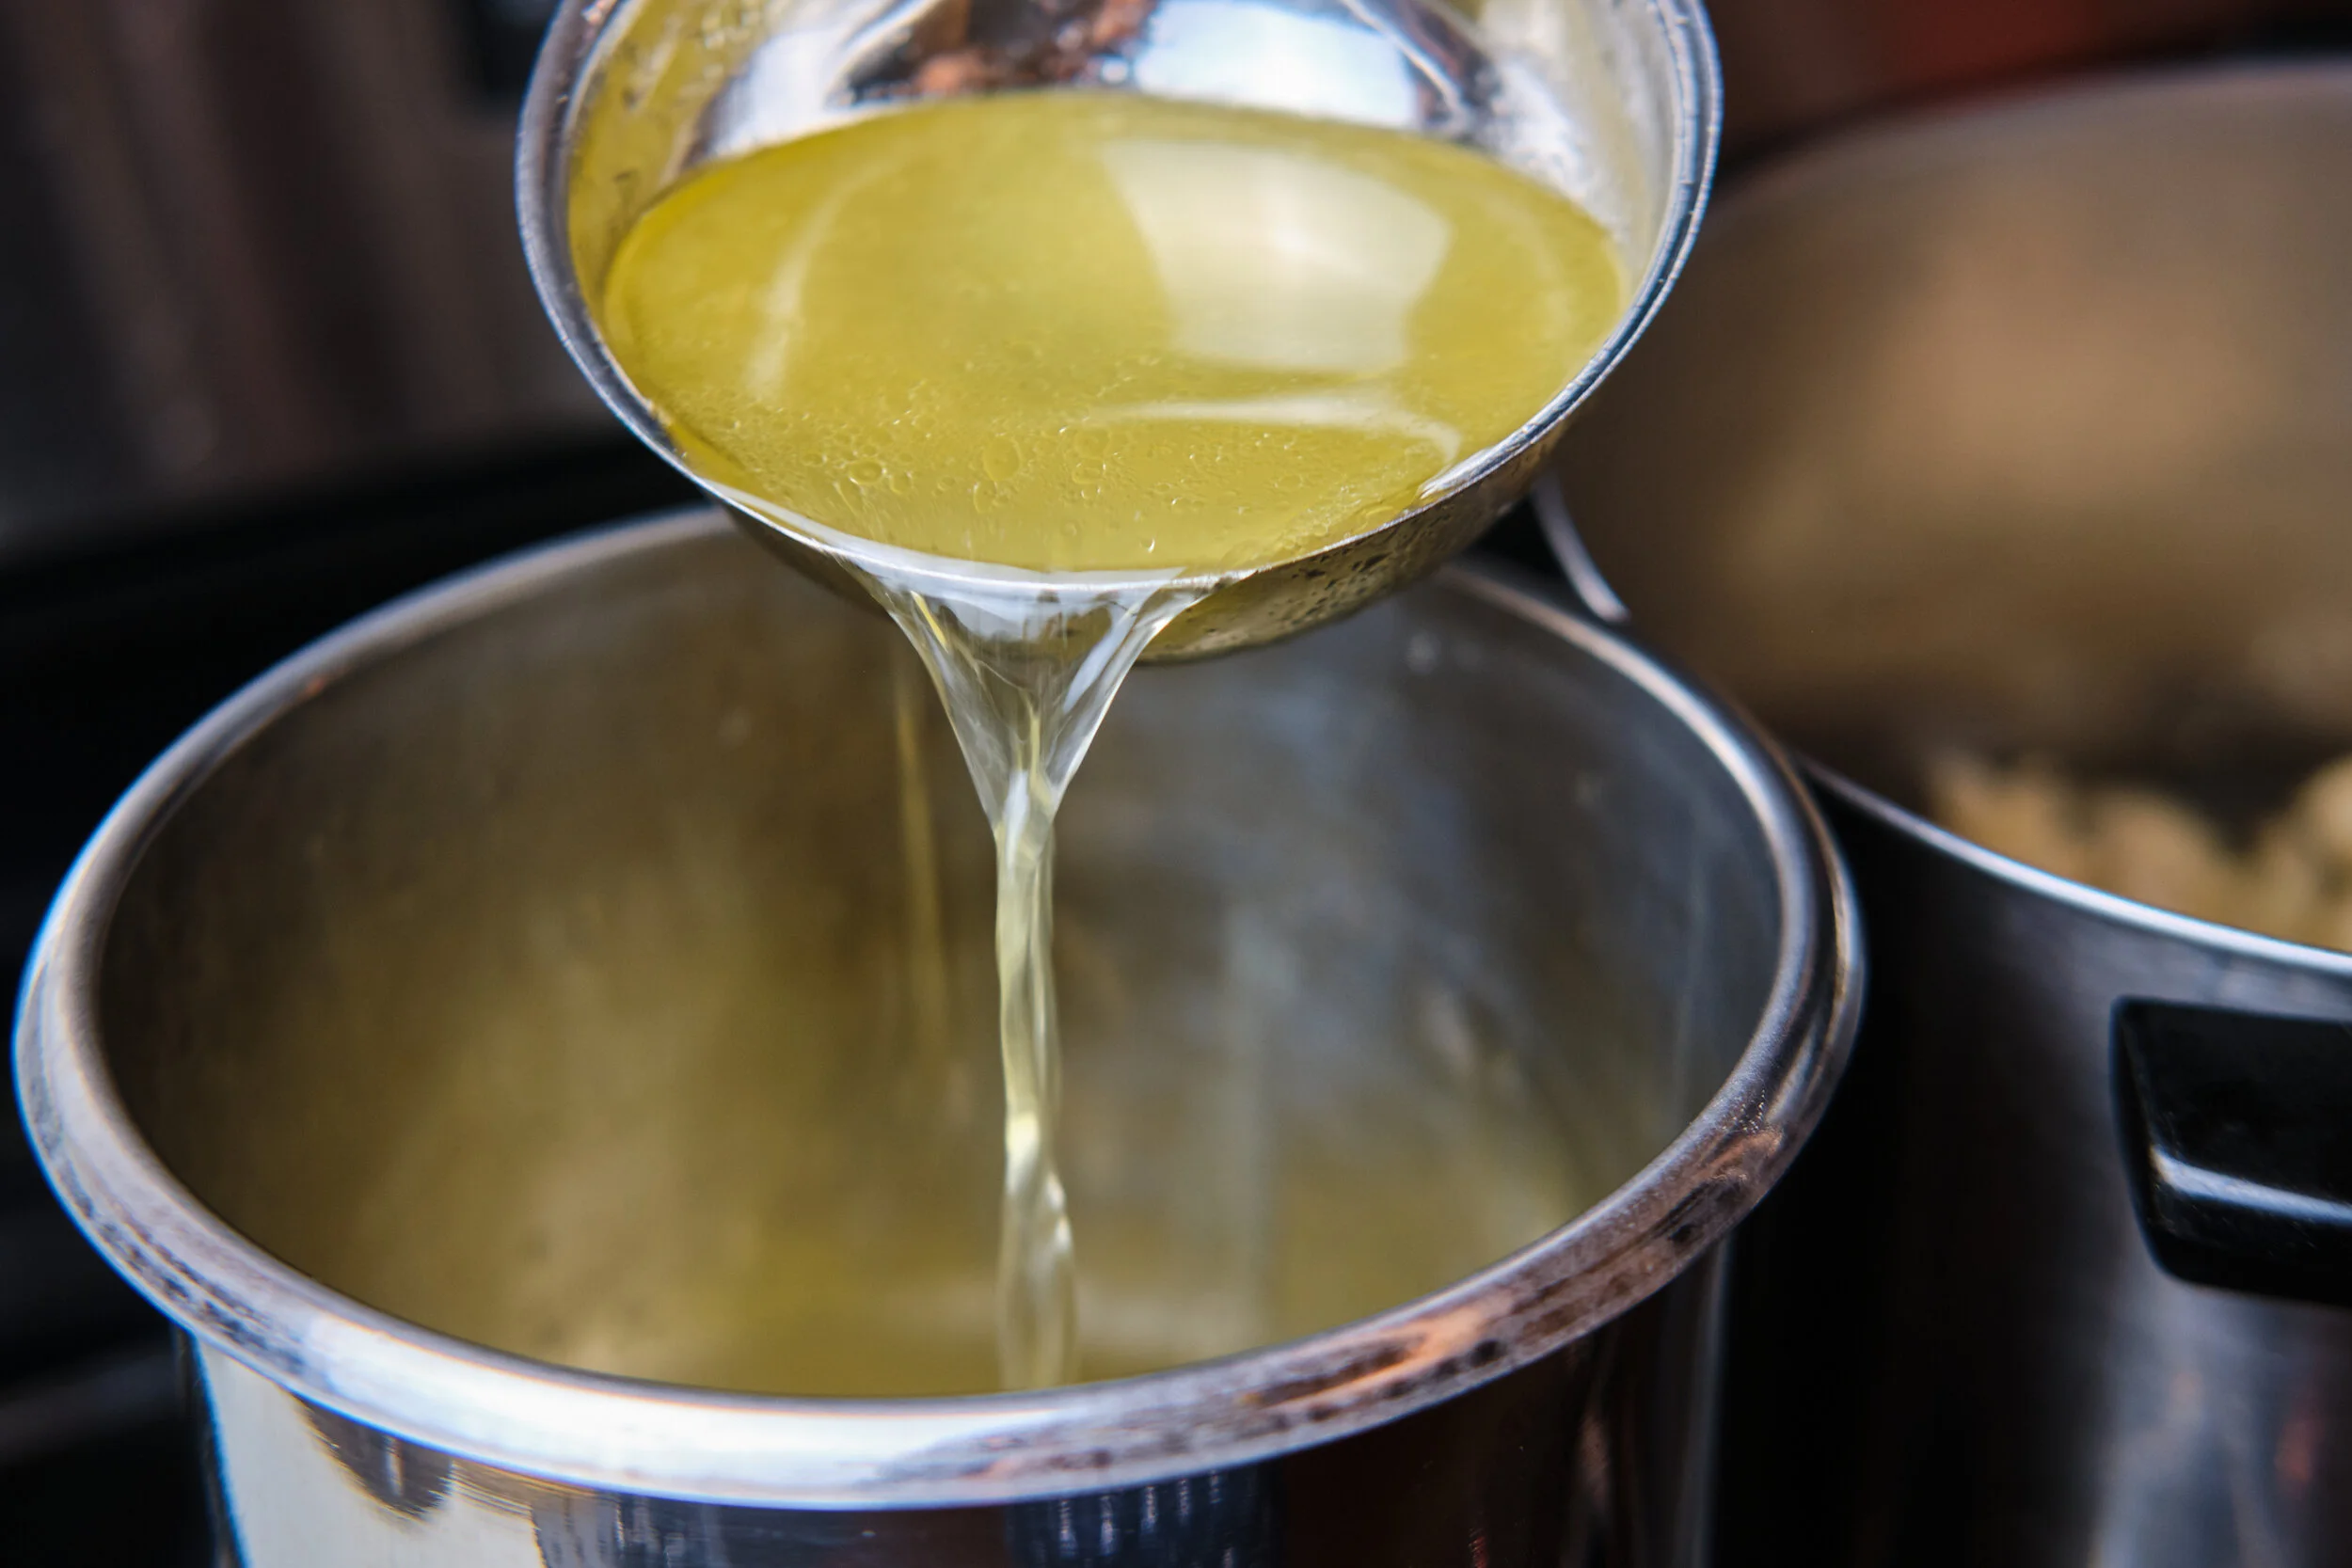
Step 4 - Aromatics and Strain
Five (5) hours after simmering on low heat, add your whole onion cut into eighths and your garlic bulb cut in half. If you want a more garlic forward flavor, you can smash the cloves and cut into smaller pieces. Continue to simmer the broth for one hour to get the most out of your aromatics. After an hour, you will begin to lose a lot of the volatile aromas from the garlic and onions.
Once the hour with the aromatics have passed (6 hours in), strain your broth slowly into a clean container. You will end up with liquid gold. If you are serving it right away, skim the fat off the surface with a ladle and set aside for other purposes. If you will be using it another day, chill the stock as quick as possible to retain the flavors. You can immerse your container into a much larger water filled container. Run cold water into the larger container to displace the water that heats up. Alternatively you can place your stock into an ice bath for quicker results.
This chicken stock is so delicious that it has carried me throughout my journey up till this point. It is so delicious and so pristine that I have used this as the basis of most of the ramen I have made over the past few years. The recipe is a little wordy in order to describe the nuances that go through my head, but overall the steps are not too difficult. With a little patience you will have yourself an amazing and versatile chicken stock that you can use everyday.